Thursday, December 17, 2009

Fabric Poinsettia Ornament

Piece Name: Fabric and Oil Paint Poinsettia Ornament

I have been making a handmade ornament for my former Pastor's wife on and off since I was in our church's Youth Group. Let's just say the last time I was in Youth Group it was 1991!! So I've been doing that for quite a awhile. I can't remember if I have made something for every year between then and now, but I have done a lot of them and especially since they left the church and moved on from ours. Click here to see an example of one I made in the recent past.

I usually tuck the ornament into their Christmas card, so by necessity it has to be light weight and pretty flat. This year I went up into my quilt studio with a vague idea and sat down in front of my sewing machine. This is what I produced. It took about an hour and is my own design. For an off the cuff project I have to say I am pleased. It gives a good impression of being 3D while being very, very flat and thin. The flower uses four different fabrics with matching thread. I used a layer of embroidery stabilizer between the front and back fabrics to give it a bit of body. Because I thought the flower lacked depth I used Shiva Oil Paint Sticks to add a bit of accenting and color depth (which looks far better in person than in the photo). It was the first time I have used them. I got them for Christmas a few years ago but haven't had the occasion to use them until now. They are so cool. I have to find more uses for them!

I am kind of sad to mail this one as I like it quite a bit!

Completed: December 17, 2009

Tuesday, December 15, 2009

Homemade Christmas Cards

Piece Name: Homemade Christmas Cards

I guess this blog will start having paper crafts now in addition to the jewelry and quilting! I'm not changing the name to "The Wired Paper Quilter" though!


I needed a Christmas card for a coworker and had some left over trees from another project. I decided to make a homemade card. It reminded me of evergreen trees on the side of a snowy peak. I loved the result so much that I cut out more trees and made a whole forest of cards for all the people on my list to which I mail Christmas packages. I am so pleased with how they turned out and how they all look similar but are all unique too. I don't have much free time for my own hobbies let alone creating things for others. The people I make things for mean a lot to me else I wouldn't take the time or effort to do them. I hope they realize that the making of these cards shows how much I care and that I gave up my precious little free time for them. Even if they don't, I know...and if they are reading this they know too! :)

Pieces Completed: December 2009

Thursday, December 3, 2009

An Infomercial and a Black Friday Blowout Deal?!?

Piece Name: 25 Days for Warren

Sorry for the lack of posts lately. Everything I am working on is destined for Christmas gifts, so no goodies to share for now. I do promise a glut of posts after Christmas though!!!

Anyhow..back to this post. So I fell asleep on the couch watching television. I woke up in the middle of the night to an infomercial about the new 24" Cricut Expression scrapbooking machine by Provo Craft (NAYY). I thought wow what a neat machine, but I'm not a scrapbooker. I kept watching anyhow. Then they showed how you can use it for quilting to cut out applique shapes. OK SOLD! If it is a quilting tool odds are I own it!!! Anyhow, this is NOT an inexpensive machine. So I was good and didn't order it (unusual restraint for me I know!), but I did keep it fresh in my mind and did a little web searching. Even the cheapest prices I found online put the machine in the $250 range. Still too steap for occasional use for quilting. Then on Black Friday in Walmart I found this exact machine for a blowout deal of $100 even! OK SOLD! I thought it was mismarked. It wasn't. YAY! I also picked up two cartridges which were also on sale. I cracked the sucker open and started playing.

I decided I needed a project to get myself familiar with the machine and the cartridges. Remembering that my 3 1/2 year old nephew loves getting mail, I decided to send him a "Days Until Christmas Countdown" note everyday leading up until Christmas to get him uber excited. I am using 4"x6" colored index cards as the base for each. Everything else, including the envelope is made on the die cutting Cricut machine. How cool is that! I am officially addicted to this machine and have a couple of quilts using it rattling around in my head. After Christmas maybe I'll have some time to actually start them!

I have all the notes done and have begun mailing them daily. I usually create three at a time. Here are the notes in order of delivery. WARNING TO MY SISTER AND NEPHEW: Don't open this link if you haven't received all the notes yet...else you'll ruin the surprise! The rest of you...you can look right now by clicking here. I apoligze for the couple of blurry shots. I sealed the envelopes already so I couldn't retake them.

This has been fun even if it is a very, very simple scrapbooking type project. It certainly is familiarizing me with the Cricut machine and even more important is making my nephew smile and get excited for Santa.

Pieces Completed: December 2009

Monday, October 26, 2009

MidSummer Night's Dream Swap/Challenge...Finally Posted in October!

I belong to a boatload of jewelry related Yahoo groups. Mostly I lurk and absorb the talent displayed, but occasionally I join in on the fun. Back in March on the WWJSwaps-n-Challenges group one of the members named Lisa proposed a swap/challenge. The theme was Shakespeare's "A MidSummer Night's Dream". We had to create a wire item of our own creation that could be used in a completed piece (e.g, a clasp, charm, focal, etc.) and that fit with the theme. We then sent our completed item to our partner and they in turn sent theirs to us. I made this pendant named "Fairy's Lyre" in copper and pale pink and green Swarovski crystals as that was the metal and colors my swap partner requested. This was of my own design and not from a pattern. The superstructure of the lyre is all one piece of wire. The tight weaving work took awhile! I was quite pleased with the results and was sad to send this one on its way! I told my Swap partner Betty that I preferred either sterling silver or rolled gold and to surprise me. This is the fabulous pendant Betty made for me.

That was the swap, now for the challenge! The second part of this activity was to create a full piece in the theme that incorporated the completed item we were mailed. This is the piece I made using Betty's pendant. It is called "Titania's Torque, Necklace of a Queen" after one of the characters in the play. Betty made this stunning necklace called "Celtic Spring". Gorgeous isn't it!!

If you've never taken part in a swap or a challenge I suggest you jump in and try. It's fun and enlightening! Thank you Betty for your lovely work and insrpiration and thank you Lisa for thinking of and running the challenge!

Pieces Completed: April 2009

A Celebration of the 2009 Four Generation Boos Family Reunion!

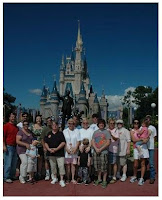
My wonderful in-laws hosted a four generation family reunion in October in Walt Disney World. It was wonderful. All my husband's siblings (and their children and children's children) were all in the same place at the same time which very rarely happens. It was so awesome to have all eighteen of us from four generations and four states all in one place together!

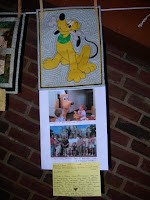
Just days after my return I attended my guild's October meeting. I was running a Notebook Quilt guild activity where everyone participating had to create an 8.5"x11" mini quilt in the theme "Real or Imaginary Places or Things".

I decided to celebrate the wonderful family reunion with this creation for the guild activity. Pluto is my niece Allie's favorite character so I chose to make him the theme of my entry. Great fun to make!

Piece Completed: October 2009

ONE LOVELY BLOG AWARD!

WOW! I feel like I've made it big time by receiving a blog award. LOL! I feel so very honored to be nominated by the EXTREMELY talented and lovely Mei (open in FireFox) for the "One Lovely Blog Award". It's like when your role model that you admire and aspire to be like recognizes you and your talent. You're on top of the world. :)

Per the rules, I am to provide the name and link of my nominator (see above) and I am supposed to pick out 15 blogs that I just found out about. I spent a couple of hours picking out my 15 blogs to nominate. So much so my carpal tunnel is bothering me from all the scrolling and clicking! I found these from trolling through the people who follow my blog, some I already knew about but wanted to recognize anyhow, looking through other people's followers, and Googling. They are listed below in random order. They are all "One Lovely Blogs!"

Stop by their blogs, say hi, and enjoy! I know I certainly have a whole messload more blogs I am following!

Lorraine - The Rabbit Factory

Karen - The Quilters Hall of Fame Blog

Kathie - Inspired by Antique Quilts

Lynda - Peripheral Vision

Cluny - The Jewelry Blog

Sheela - Eclettica Bijoux Haute Couture

Gina - More Minis @ Blogspot

*** Removed. Blog owner changed hands and Blog completely changed content direction. Blog no longer one of my choices. ***

Anna - Blue Almonds Bespoke Hand Crafted Jewellery

Supermom - Quick Queen of Quincy Quilting Blog

Shrimpton Couture - The Shrimptom Couture Blog

Zoya - Gem and Beaded Jewelry

Mimsy Muse - Musing on All Things Mimsy

Kim - Kusz Jewelry & More

Christie - Pretty Paper Blog

Wednesday, June 10, 2009

Love Apple Quilters
2006-2008 Executive Board Quilt


Piece Name:
LAQ 2006-2008 Executive Board
Quilt Show Volunteers Quilt

My quilt guild Love Apple Quilters of Cherry Hill, NJ has a quilt show every two years or so. For the 2007 Quilt Show the Executive Board that just stepped down at the time started a new tradition. They made a lovely group quilt. Every member of the guild who volunteered at the show got their name thrown in a hat. One lucky winner's name was drawn and won that quilt...and it wasn't me. DRAT!

The Executive Board during my presidency (2006-2008) loved the tradition and wanted to continue it for the LAQ 2009 show. We chose an ambitious quilt pattern from the March 2008 "The Quilter" magazine called "Jewel of the Night" by Roxanne Carter. We just loved the quilt and the colors used in the magazine and wanted to mirror them as closely as possible because they just glowed. We went on a fabric buying road trip to Amish country in Lancaster, PA and purchased the fabrics from three different quilt stores. It was a fun day!!! We did pretty darn well I think! If you'd like to compare the magazine's quilt to ours click here to see theirs.

We each made blocks and I assembled and quilted the quilt. I didn't get it done in time for the 2009 show in March (bad me!!!), nor for the April or May meetings (hey a I work full time and am a busy lady!!), but I FINALLY got it done for the June meeting and handed it over this week (tearfully I might add!). I am going to ask the lucky winner (not me again darnit!) to hang it in the next show.

The quilt turned out so nicely! There is a label on the back (above) listing all of our names and the offices we held. You can see us here with the quilt.

Left to Right: Melissa S. Boos (Me), Rachael Victor, Denise Mohan, and Donna Walker. Not pictured Phyllis White.

Quilt Completed June 8, 2009

Sunday, May 24, 2009

Helm's Weave Chain Maille Bracelet

Piece Name: Helm's Weave Chain Maille Bracelet

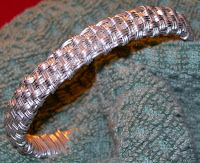
This is a very feminine 8" Helm's weave (aka Parallel weave) Chain Maille Bracelet made with 20 gauge Argentium Sterling Silver wire using two mandrel sizes. This is another bracelet I wear all the time.

This isn't the first time I've done Chain Maille (click here for another example), but it is the first time I FULLY made the bracelet from start to finish. That means I selected the two mandrel sizes, coiled the wire myself, used my Koil Kutter to cut the rings (the most fun you can have with power tools BTW!), tumbled the rings, and then finally wove the bracelet. The ONLY thing I didn't create was the fancy Sterling Silver lobster clasp I had previously purchased. Prior to this bracelet I bought pre-cut rings. It is soooooo much more fulfilling to have done all these steps myself (even if it is more work)!

I have been wanting to make this weave for awhile and I have a necklace to match in the works!

Piece Completed: May 2009

Cubic Drop Pendant

Piece Name: Cubic Drop Pendant

I purchased the Love Knot Cubic Earrings tutorial from the very talented "de cor's Handmades" shop on Etsy (along with most of her other tutorials!!). This was my first attempt at this tutorial. I used Argentium Sterling Silver. I wasn't 100% pleased with the final result (I need more practice) and didn't end up making a second earring when I made this piece.

This sat unused for awhile. One day I remembered the loan cube and thought it would look pretty as a pendant. I put it on a silver chain. I was right. It does look pretty! It is simple and elegant as a pendant and isn't too small or too large. When I wear silver I most often wear this as a compliment.

I HIGHLY recommend any of "de cor's Handmades" tutorials. They are first rate.

"Woven Checkerboard Bracelet" Class at Beadfest Wire

Piece Name: My First "Woven Checkerboard Bracelet"

Lest you think ALL I do is quilt....let's post some jewelry!!! I took a class at the May 2009 Beadfest Wire Convention called "Woven Checkerboard Bracelet". The class was 7 hours long and I finished the bracelet in class. I LOVE when that happens. YAY! The instructor was Debbie Williams. What a neat technique! The class sample was tri-colored but I opted for all Argentium Sterling Silver. Even though it has many first timer imperfections, they aren't noticeable to the casual viewer unless I point them out (and I won't!). I wear it ALL the time (which you can see since it desperately needs a tumbling to clean and shine it up) and I can't wait to make another one to fix all my first timer sins and improve upon my technique. I am also looking forward to trying different colored wire combinations.

If you find yourself at Beadfest in need of a class, I suggest learning this technique. Email me if you'd like an attendee's review of the class.

Piece Completed: May 2, 2009

My Mini Quilt Auction Purchase!!!

Piece: United States Flag in Mini Yo-Yos

Remember this post and this post? These were my contributions to the 2009 Love Apple Quilters Silent Mini Quilt Auction for Charity. This year I was lucky enough to win the one I bid on! This wonderful mini quilt was made by Love Apples member Nancy White. These are some tiny yo-yo's I can tell you!!! I admired it while she was making it and knew I had to own it. It's great isn't it!? Even better that the proceeds went to a worthy charity.

Purchased: March 15, 2009

Pre-Civil War Quilt

Piece: Pre-Civil War Lily Quilt

I was at the 2006 Lancaster, PA Quilt Show. In one of the antique quilt vendor stalls this quilt was folded up in a stack with just a hint of the flowers peeking out. I was smitten even before I unfolded it. The bold yellow-y/green on such an old quilt just spoke to me. It was old...older than any other quilt in my antique quilt collection. I wanted it! The price for it was quite fair for $475, but was WAYYYY more than any price I had paid for a quilt to date or since. The vendor was kind enough to take layaway. YAY!

At the 2009 Love Apple Quilters Quilt Show member Mary Cahilly had a Reproduction Civil War Gown display. This quilt hung as a backdrop to the gown display. While it was hanging I had my quilt appraised by certified AQS quilt Apprasiser Karen Dever. It is hand appilqued, pieced, and quilted. Unusual for the period, the borders are mitered! I found out that the quilt dates to approximately the 1840's...Pre-Civil War! I also found out that the value is quite stupendous. A smart buy that I made in 2006! I love this quilt and it is the jewel of my collection.

Purchased: Spring 2006

"My Hawaiian Rainbow" Quilt

Piece Name: "My Hawaiian Rainbow" Quilt

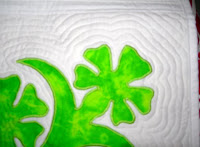
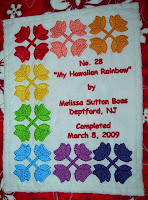
I have been working on this quilt on and off for YEARS. It is satin stitch machine appliqued and machine quilted. I started it in 2004, had all the blocks done and two of them quilted by early 2005, and then let it sit for years until early 2009 when I finished machine quilting each of the blocks. I then used an entirely machine quilt as you go method to finish the quilt. I LOVE the vibrancy of this quilt and it reminds me of a cruise to the Hawaiian Islands my husband and I took back in 2004. The back is a gorgeous red Hawaiian fabric print. Most of the patterns come from the book Hawaiian Quilting by Elizabeth Root.

This quilt hung in the 2009 Love Apple Quilters quilt show.

Quilt Completed: March 8, 2009

"The 1930's Were A Good Decade for Tulips" Quilt

Piece Name: "The 1930's Were A Good Decade for Tulips"

This was another UFO quilt that sat started and unfinshed for years. I made the top in late 2005. I only recently finished it for the 2009 Love Apples Quilters quilt show. The quilt is zig zag stitch machine appliqued and machine quilted. I used many many prairie points. I named it after my use of several 1930 reproduction fabrics. I love this quilt because it is bright, fun, traditional, and modern all in the same quilt.

The pattern is from the book Pick a Pattern Applique & Variations by Joan Sjuts Waldman.
Quilt Completed: March 3 2009

"My Lone Star Garden" Quilt

Piece Name: "My Lone Star Garden"

I made this quilt for the 2009 Love Apple Quilters Quilt Challenge. The main rule of the challenge was that we had to use the two floral prints you see in the pictures. The fabrics from the challenge just didn't speak to me until the VERY LAST MINUTE. Usually for these challenges I know almost immediately what I am going to make. Not this time as I really sweated it out and almost didn't do one. I put this together in the final weeks just before the challenge deadline. I am so glad that I did and I am pretty darn pleased!

The pattern is from Debbie Maddy's Shining Star Quilt as seen on HGTV's Simply Quilts with Alex Anderson. I had printed the instructions out right after seeing the show way back when and pulled them out for this challenge. I love the look of the star and I love the total lack of diamonds and inset seams! You have to be a pretty good piecer though...lots of seams to match up!

This hung in the 2009 Love Apple Quilters Quilt Show.

Quilt Completed: February 2009

Sunday, February 8, 2009

3D Tutu!!!

Piece Name: "For the Love of Ballet...and Little Girl Dreams" Mini Quilt

You'll remember from this post that I had made two mini quilts for my quilt guild's charity mini quilt silent auction. I had hoped I would make at least one more after my own quilts were done for the show (which they aren't all yet...GULP!!). Anyhow, I was making the ribbon hair scrunchies this weekend for the boutique (see previous post) and the first one I made didn't turn out right. I didn't want to waste the ribbon and it looked so pretty even as a failure. After playing around with it it reminded me of a ballerina's tutu...and well, this was born. I used the failed scrunchie as the 3D poofy tutu on this mini quilt. I framed the whole thing with ribbon which reminds me of ballet slipper ribbon laces. Hopefully one of the quilt show goers will have a special little ballerina in their life and will bid on and win this little mini. 100% of the proceeds from the silent auction go to charity. P.S. The quilt is crooked in the pictures based on the angle I snapped the picture, but in real life it is correctly shaped.

Completed: February 8, 2009

Boutique!!!

Piece Name: 2009 Quilt Show Boutique Items

I belong to Love Apple Quilters Quilt Guild of Cherry Hill, NJ. Every two years or so we put on a very professional quilt show. Our next one is in a few weeks on March 14-15th. I am sewing and quilting in HIGH GEAR in preparation, so you probably won't be seeing any jewelry posts until I survive the show. :) Anyhow every show we have a boutique of finished items and other steals and deals. The quilt show attendees STAMPEDE there! It is one of the major money makers of the show that allows our non-profit, charity based guild continued existence for the next two years! So the members do a phenomenal job of making items for the boutique. Here is a small sampling of some of my items: tomato pin cushions, a stuffed cat with ribbon, button flower ponytail holders, ribbon hair scrunchies, and a two sided table runner.


All Completed: February 2009

Sunday, January 18, 2009

Lullaby Lamby!

Piece Name: "Lullaby Lamb" Baby Pillow

Made this baby pillow for my cousin's baby shower. She and her husband are going to have their first child...a boy. This pillow was adapted from a quilt pattern called "Lullaby Lamb". It uses the layered chenille technique, fusible machine applique, and echo quilting. It is 21"x21". I used a safety pin with a pretty blue bow to attach a little "cow" bell to the lamb which adds a nice tinkly bell sound and furthers the 3D effect of the pillow. I know I made this so I am biased, but darn this one is precious!

Completed: January 17, 2009

There Be Flowers on My Quilts!

Piece Name: "My Blue Baltimore" Mini Quilt

This a mini quilt that I made for me...all me! Not giving this one away! No way! I made this just for fun because one day I wanted to do applique. This is what I came up with after flipping through my library. I pieced the background in beige and cream (which you can't see in the photos). It gives very subtle visual interest to the piece. A simple a thing as that and I've never done before...I've always used solid one piece backgrounds. I have to say I like the subtle difference and it was worth the extra work. The block design came from one of Elly Sienkiewicz' Baltimore Beauty books, and the border I designed after being inspired by traditional swagged borders. I decided to stay in all blues because I thought the look would be powerful and clean against the cream/biege background. The quilting is traditional cross hatch and I have to say I am mighty pleased with this little quilt (22"x22"). The applique is fusible machine applique. I love making traditional designs using modern applique methods (modern meaning it gets done in my hectic schedule without fiddly hand work!). This quilt will hang in my guild's quilt show this March 14-15th (Love Apple Quilters of Cherry Hill, NJ). Completed: January 4, 2009

Piece Name: "Elizabethan Gardens of Manteo, NC" Mini Quilt

This mini quilt (24"x24") is entirely machine embroidered with a design pack you can purchase on the Secrets of Embroidery website. It took many hours of work stitching out each block with all those thread changes and then joining all the blocks together like a jigsaw puzzle (that took some skilled easing!). I chose very traditional rose petal colors, and when it was all done it reminded me of the Elizabethan Gardens in Manteo, NC. This quilt will be a very belated wedding gift for a cousin. It's been done for awhile but I have procrastinated over putting a label on it (where have you read that before!!!). It is going to be even more belated because it too will hang in my guild's quilt show this March 14-15th. Completed: Jan. 2008

Saturday, January 3, 2009

Christmas Present Earrings


Piece Names: Sparkle & Luster Earrings and Irridescent Snowflake Earrings

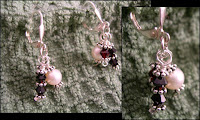
Every year my husband gives his Aunt Kathy (his Godmother) a Christmas gift. Most years this translates to me selecting and taking care of the gift for him! This year we gave her a purchased silver mesh sterling silver bracelet, but I wanted to add to it, so I created the following two pairs of earrings for her from him. This first pair are what I call the "Sparkle & Luster Earrings" because they are made with two shades of red 4mm Swarovski bicone beads (the sparkle) and 7.5mm freshwater pearls (the luster). The metal is either Argentium Sterling Silver or regular Sterling Silver. These were made with simple bead wire wrapping techniques that I thought looked pleasing together and weren't inspired by any artist in particular.

Remember that fabulous wire artist Corra I mentioned in my previous post? I purchased her Snowflake Earrings tutorial and made these "Irridescent Snowflake Earrings" as the second earring pair in the Christmas gift. What a great and easy to follow tutorial! I used multi-colored irridescent seed beads with Argentium Sterling Silver to make these. They stubbornly resisted being photographed well and look crooked (I didn't feel like getting my light studio out so that's what I get)...but I assure you they came out wonderfully (and straight despite what they look like in my photos) thanks to Corra's wonderful instruction!

Both pieces completed: December 2008